![[Tutorial] How To Root & Flash CWM Recovery On Sony Xperia M2 D2305](https://blogger.googleusercontent.com/img/b/R29vZ2xl/AVvXsEgseIZoRjcJMEmCXAmXzzFjW3MCJWLLMhs6mFNLmf_GApIxrFmePpTERKr_fo8sWavplLEZpNnOnPe_cZnvVLHtCjQZnRhMr_aRtxAm5O1MbOvEsKKOlEo8klhoQQ6c1AgJDp9Ao5aUR4yT/s1600/how+to+flash+cwm+recovery+on+sony+xperia+m2.jpg "[Tutorial] How To Root & Flash CWM Recovery On Sony Xperia M2 D2305")
[Tutorial] How To Root & Flash CWM Recovery On Sony Xperia M2 D2305
We will now flash/install a custom made recovery called "ClockWorkMod" (CWM) Recovery which enables us Flash ZIP Package files which include ROMs, Themes, Apps etc, Write permissions, wipe caches etc. It also enables us to Root the device. Get ready to Root & Flash CWM Recovery On Sony Xperia M2 D2305
Before You Begin: (must do)
1. First install drivers on your PC to support the device in fastboot mode,
a. Sony PC Companion b. Flashtool Drivers
2. You should unlock the bootloader of your phone, please go to: http://unlockbootloader.sonymobile.com/
Downloads:
1. Recovery.img (D2305 Model)
2. Fastboot.zip
3. Update-SuperSU.zip
Arranging Files:
1. Download the above Recovery img file and Fastboot.zip
2. Now according to your device model's recovery, you should rename the Recovery img file to recovery.img this reduces the creation of problem during fastboot.
3. Now Extract the fastboot.zip file.
4. Move the recovery.img file to the Fastboot folder, which you extracted before.
5. Now make sure your recovery img file is placed in fastboot folder.
Flashing Recovery:
1. Now turn off your phone. Hold Volume Up and Directly connect the USB Cable to device, release the button and you will see the LED light turns blue. Now it is fastboot mode.
2. Hold Shift and Right click on Fastboot folder and click "Open Command Window Here", a command window will be opened and type the following code:
fastboot flash recovery recovery.img3. If the reply of command window was something like this finished. total time : 3.555 sec so your recovery is successfully flashed then type the following code:
fastboot reboot
4. To go into recovery mode, Restart your phone when the LED light turns blue/pink/amber so keep pressing/tapping Volume Down button your phone will reboot in recovery mode.
Rooting:
1. Download the above Updat-SuperSu.zip file.
2. Move the file to the internal storage of your device.
3. Restart your phone in recovery mode, When the phone restarts and LED light turns pink/blue/amber/orange so keep pressing/tapping Volume Down button. Your device will boot in recovery mode.
4. In recovery mode Install zip from sdcard > Choose zip from sdcard and find the Update-SuperSu.zip file where you putted it before. Click that file and Proceed to install it.
5. After installation reboot your system. Enjoy Rooting.
Having Problems:
1. When you hold Volume Up and Connect the USB Cable and LED light turns blue then again green and goes for charging so your drivers are missing, the PC is not able to support your device in fastboot mode.
2. After entering the code if the command window reply was waiting for device so still the device drivers are missing. Try reinstalling more drivers on PC.
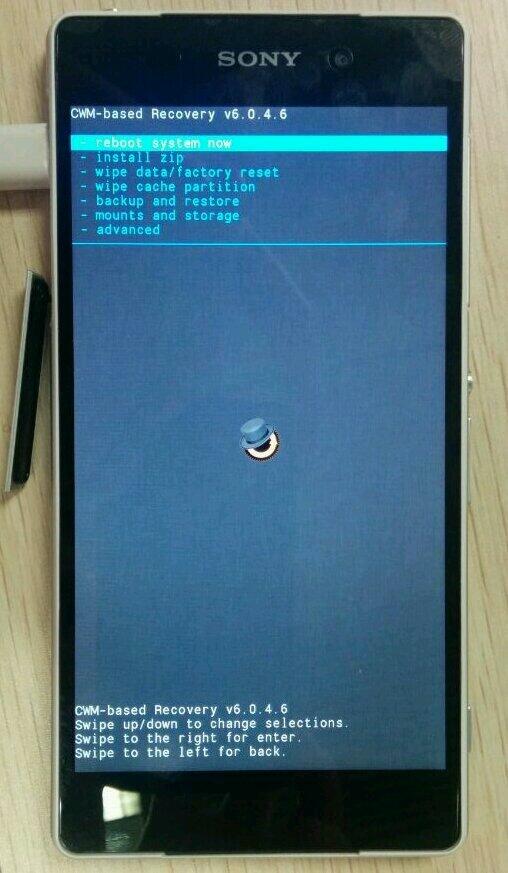
Screen Shots:
.jpg) |
| Recovery Mode |
 |
| SuperSU |
No comments
Posted at 09:53 | by
John Peter


![[Official Firmware] Samsung Galaxy Tab 4 7.0 SM-T230 T230XXU0ANE6 Official 4.4.2 KitKat Firmware](https://blogger.googleusercontent.com/img/b/R29vZ2xl/AVvXsEjHlbBgZEY0jFyFmoTh8NiQPp4vL64OqDtyXChEFpQ6HWEsrWSyK_mmqn0byv8uAQdadPoyy_HPhk-05p6pAjOGuH4TVhTjicuoOuqrfLDEzRccgQMd26s14lWRQpaym1dX_V20i9z7nS1o/s72-c/samsung+galaxy+tab+4+7.0+4.4.jpg)

![[Official Firmware] Samsung Galaxy Tab 3 7.0 SM-T211 T211XXBNF5 Official 4.4.2 KitKat Firmware](https://blogger.googleusercontent.com/img/b/R29vZ2xl/AVvXsEivgSdzMDkBtvpZzsSvkNqN-Qs5RlJhtV20kKHMPQ6490lFMxxa8pesjTTvQF0mYOaMJbktncDZ0758YyJJtPrS9clh4nZQniAhXBb3EZMxNzIzJBuO_eDxE31VWLduJjajrVqAI8fw2w48/s72-c/samsung+galaxy+tab+3+7.0+official+4.4.2+kitkat+firmware.jpg)
![[Official Firmware] Samsung Galaxy Star Pro GT-S7262 S7262JVUANB2 Official 4.1.2 Firmware](https://blogger.googleusercontent.com/img/b/R29vZ2xl/AVvXsEjV_TN4oF3yjOhq1NzJUstfLZJakn-a_o-1uYyU_mUYMQirlTb9PAwWA71jCxVUglYQcQfGUPlkUbk03ekF6JrGP4WhXdCxSnA8g1gk4gjnmq8KPb6x1Jow7GkDu9e59hyphenhyphenqzmN_66pVxP-H/s72-c/official+firmware+for+samsung+galaxy+star+pro+gt-s7262+official+android+4.1.2+firmware.jpg)

![[Official Firmware] Samsung Galaxy Fame DUOS GT-S6812 S6812DDAMD3 Official 4.1.2 Jellybean Firmware](https://blogger.googleusercontent.com/img/b/R29vZ2xl/AVvXsEjepIxLCxEJl2Cec8XBY9LRDNLHwPalSj_jZWT42-aAf781vEZc_61zPyCirAoxE-IrLmWq9CQNthAZZklgLBifij0fZUNGxjEJfhynCT17YTKUJj3nLdgcQ5WBgZmxmuaRJIOUy6FI9yIW/s72-c/samsung+galaxy+fame+official+firmware.png)


